Masks & Lightroom - P1
My first encounter with Lightroom's masking panel didn't go well.
This was last summer (i.e 2022), after installing the latest trial in order to convert 1EYE Capture One Style Packs. I was curious to explore this feature, which hadn't existed the last time I'd used the app. But it turned me off almost instantly: a floating panel, submenus, something about intersects...wth? I think I even had a conversation about it with a few of you on our Slack channel, swearing in the same breath to "never go back to Lightroom"—yeah, the irony isn't lost on me :)
In this first look at masking I want to share a few tips that helped me wrap my head around Adobe's approach, and to ultimately settle in.
1. Dock It
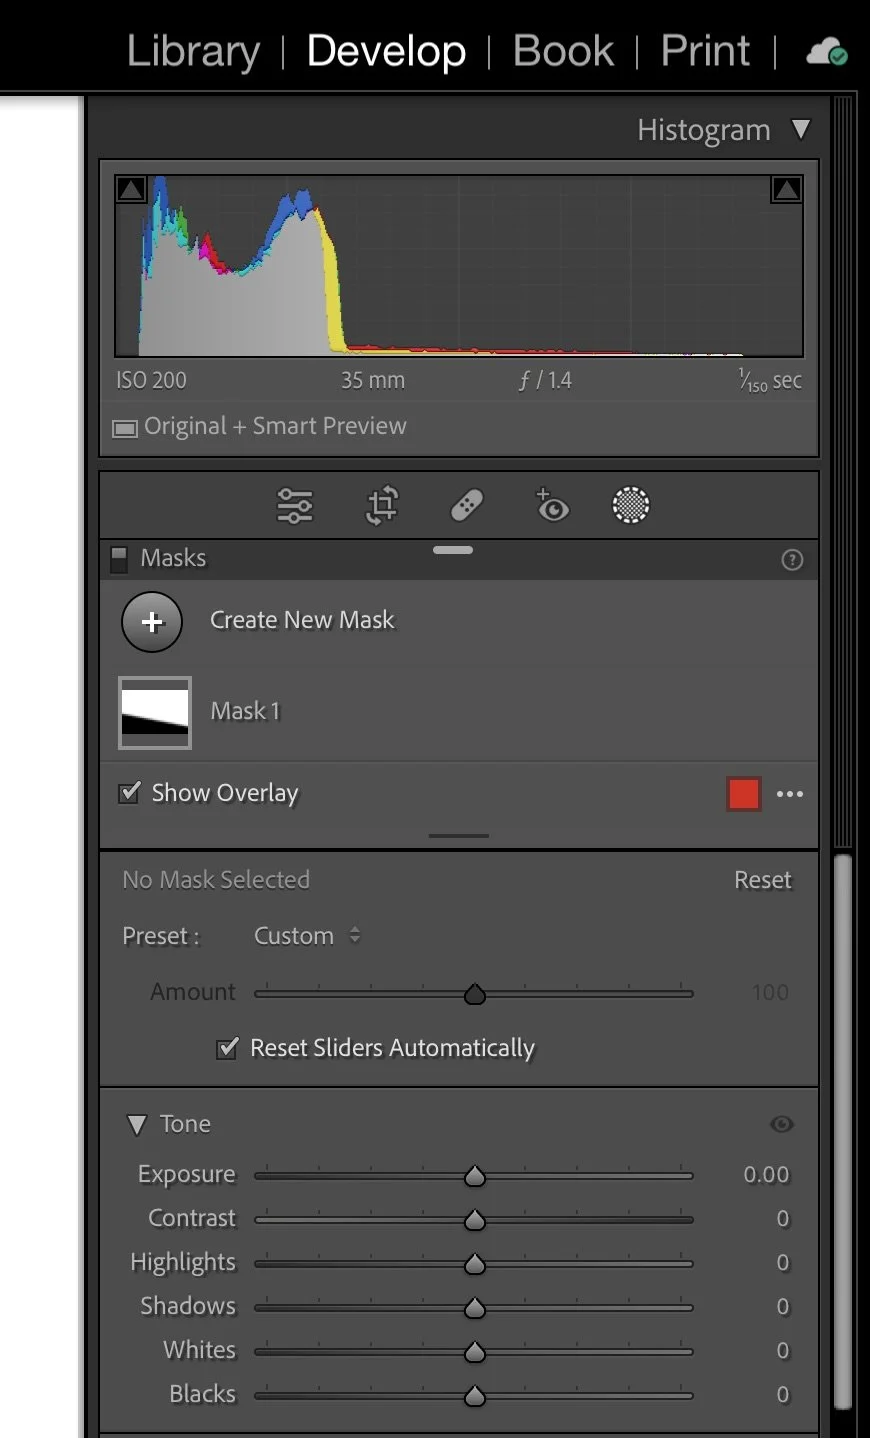
This first item is about aesthetics and coherence. The masking UI in Lightroom is treated as a specialized tool, meaning that it's temporary, visible only when called upon. If it's active it even adds a dedicated set of keyboard shortcuts that override other functions: the N key for instance (which is otherwise linked to Survey Mode), creates a new mask. It's a little like an app within an app:
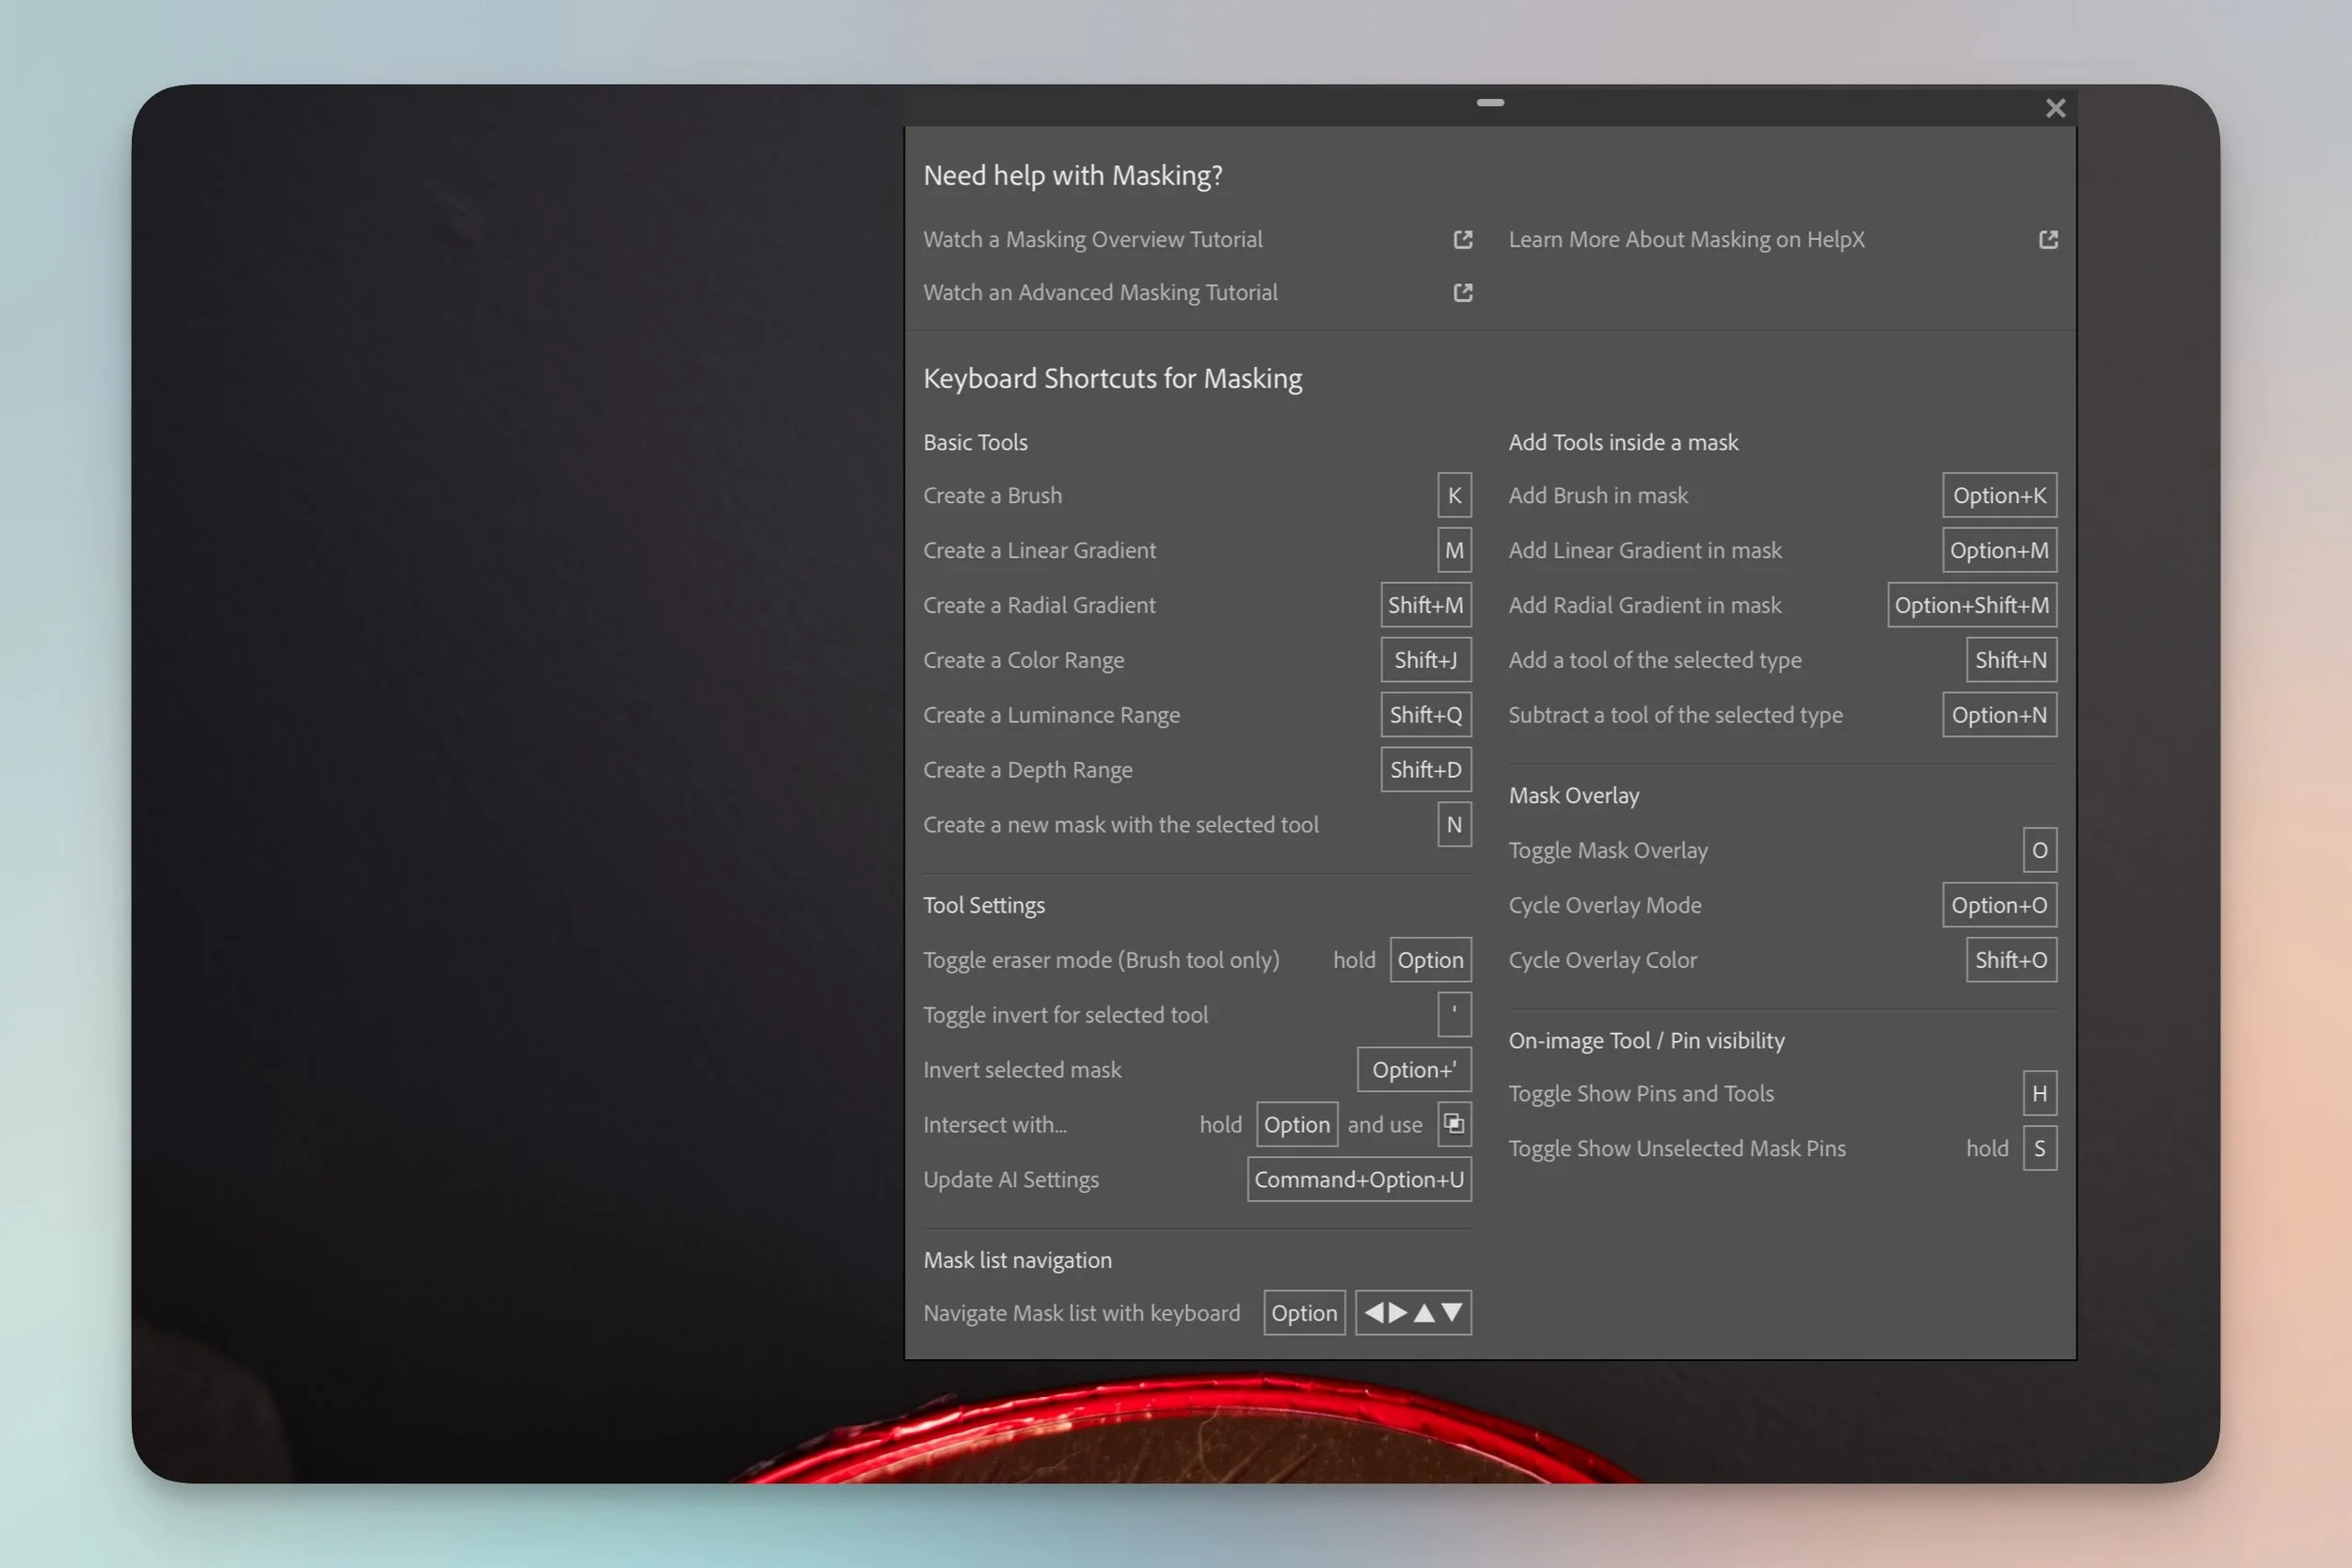
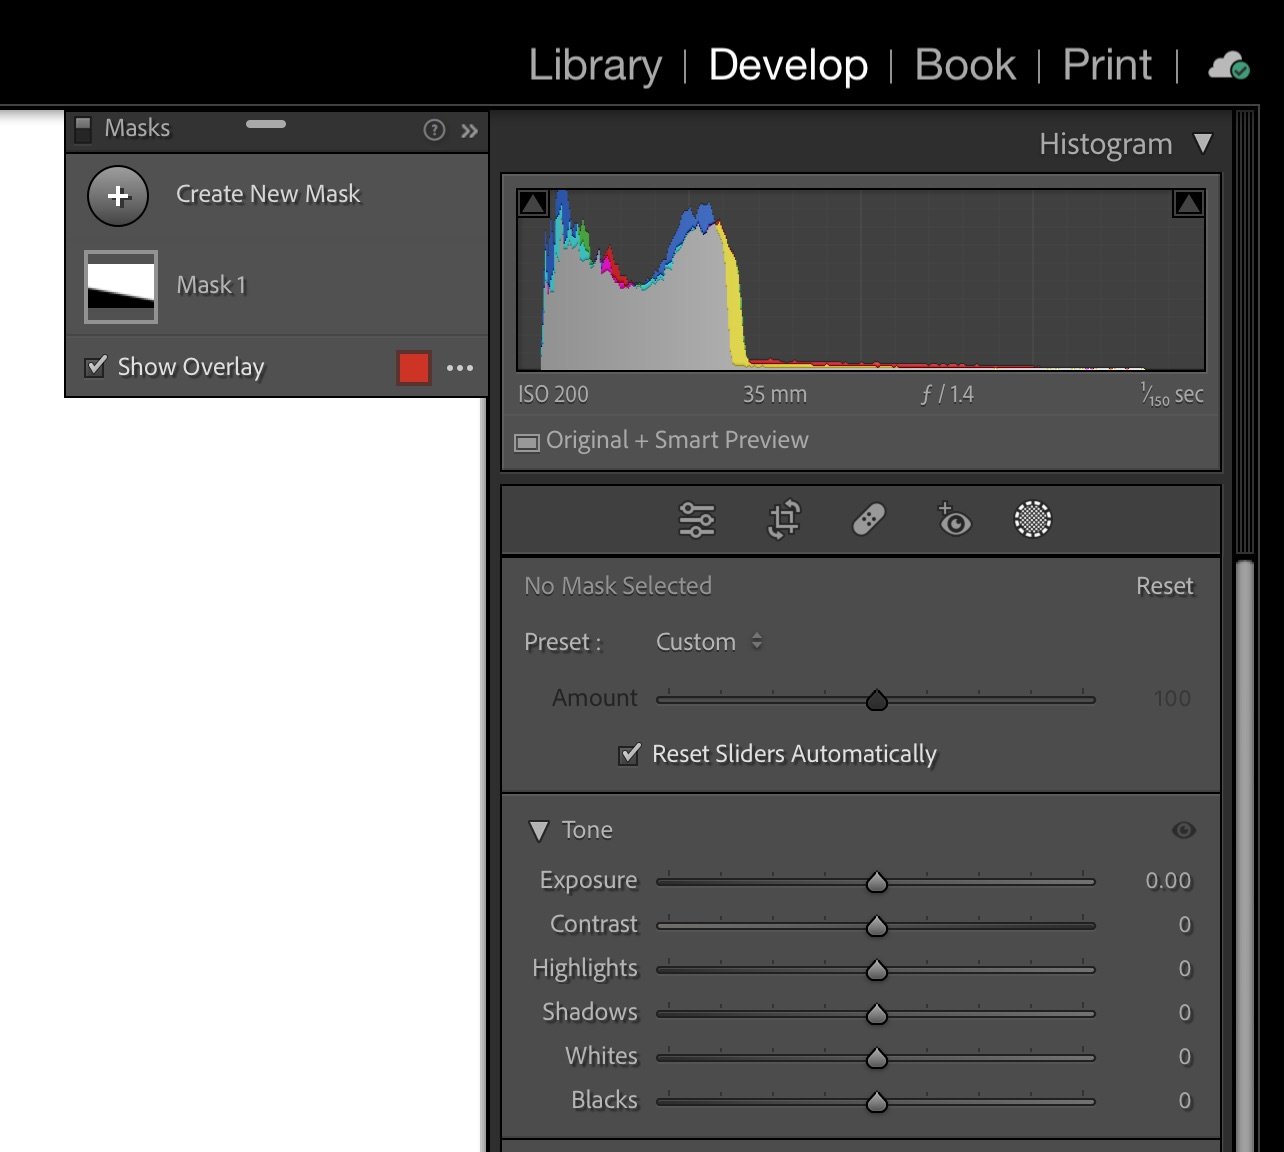
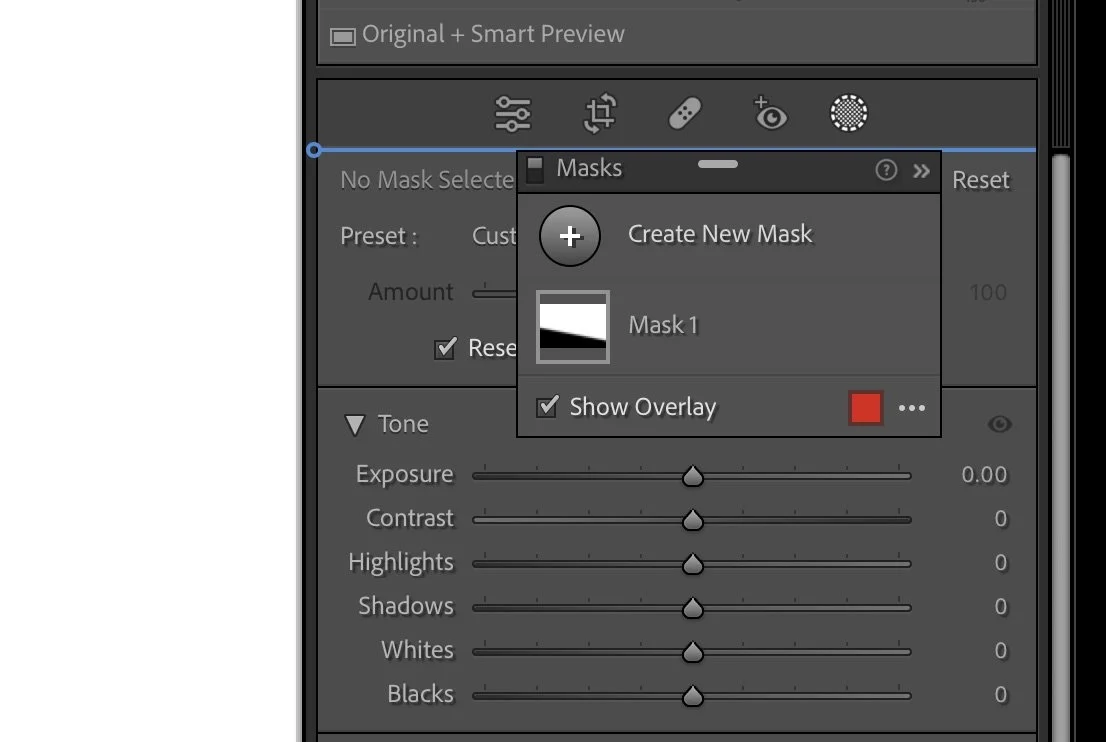
This probably explains why the panel's default behaviour is to float alongside the tools sidebar. But I find this 1) messy, and 2) annoying, because it potentially hides the top part of any image we're working on. The good news? It doesn't need to be this way. Dragging the panel to the top of the sidebar will dock it:
The panel remains docked as long as it isn't dragged out again. It still toggles on and off, but at least it now lives alongside all the other tools. Plus, as a C1 expat, this brings the layout closer to the way I'd set up layers in that app (more on this in a sec).
2. learn the keyS
Unlike Capture One, there's no need to create a new layer before choosing a masking tool [1], a small detail that actually speeds up the process considerably once you get used to it. With this in mind, it pays to remember a few basic keyboard shortcuts:
M = linear gradient.
Shift+M = radial gradient.
K = brush.
While editing an image, hitting any of these keys will immediately 1) switch to the respective tool, and 2) open the masking panel. I find this much more fluid than Capture One's process because you can easily go from one tool to another, adding different masks to an image without any interruption. Here's a very quick example of this in action:
Also notable, as someone who's typically too lazy to rename anything: thumbnails. Did I mention thumbnails? Yeah, thumbnails.
Another keyboard shortcut that should become second nature: Shift+W. This toggles the masking panel ON and OFF—for me this is now just as ingrained as D for Develop, and G for Browser (G for grid, I imagine).
3. add and subtract buttons
This is THE behaviour that threw me off during my initial encounter with masking: ADD and SUBTRACT buttons aren't visible by default. When working with masks, it's common to refine the areas they cover: you may paint around edges or erase portions of a radial gradient, for instance. This is called adding and subtracting. But here's the panel as it appears after creating a linear gradient (also visible in the above video):
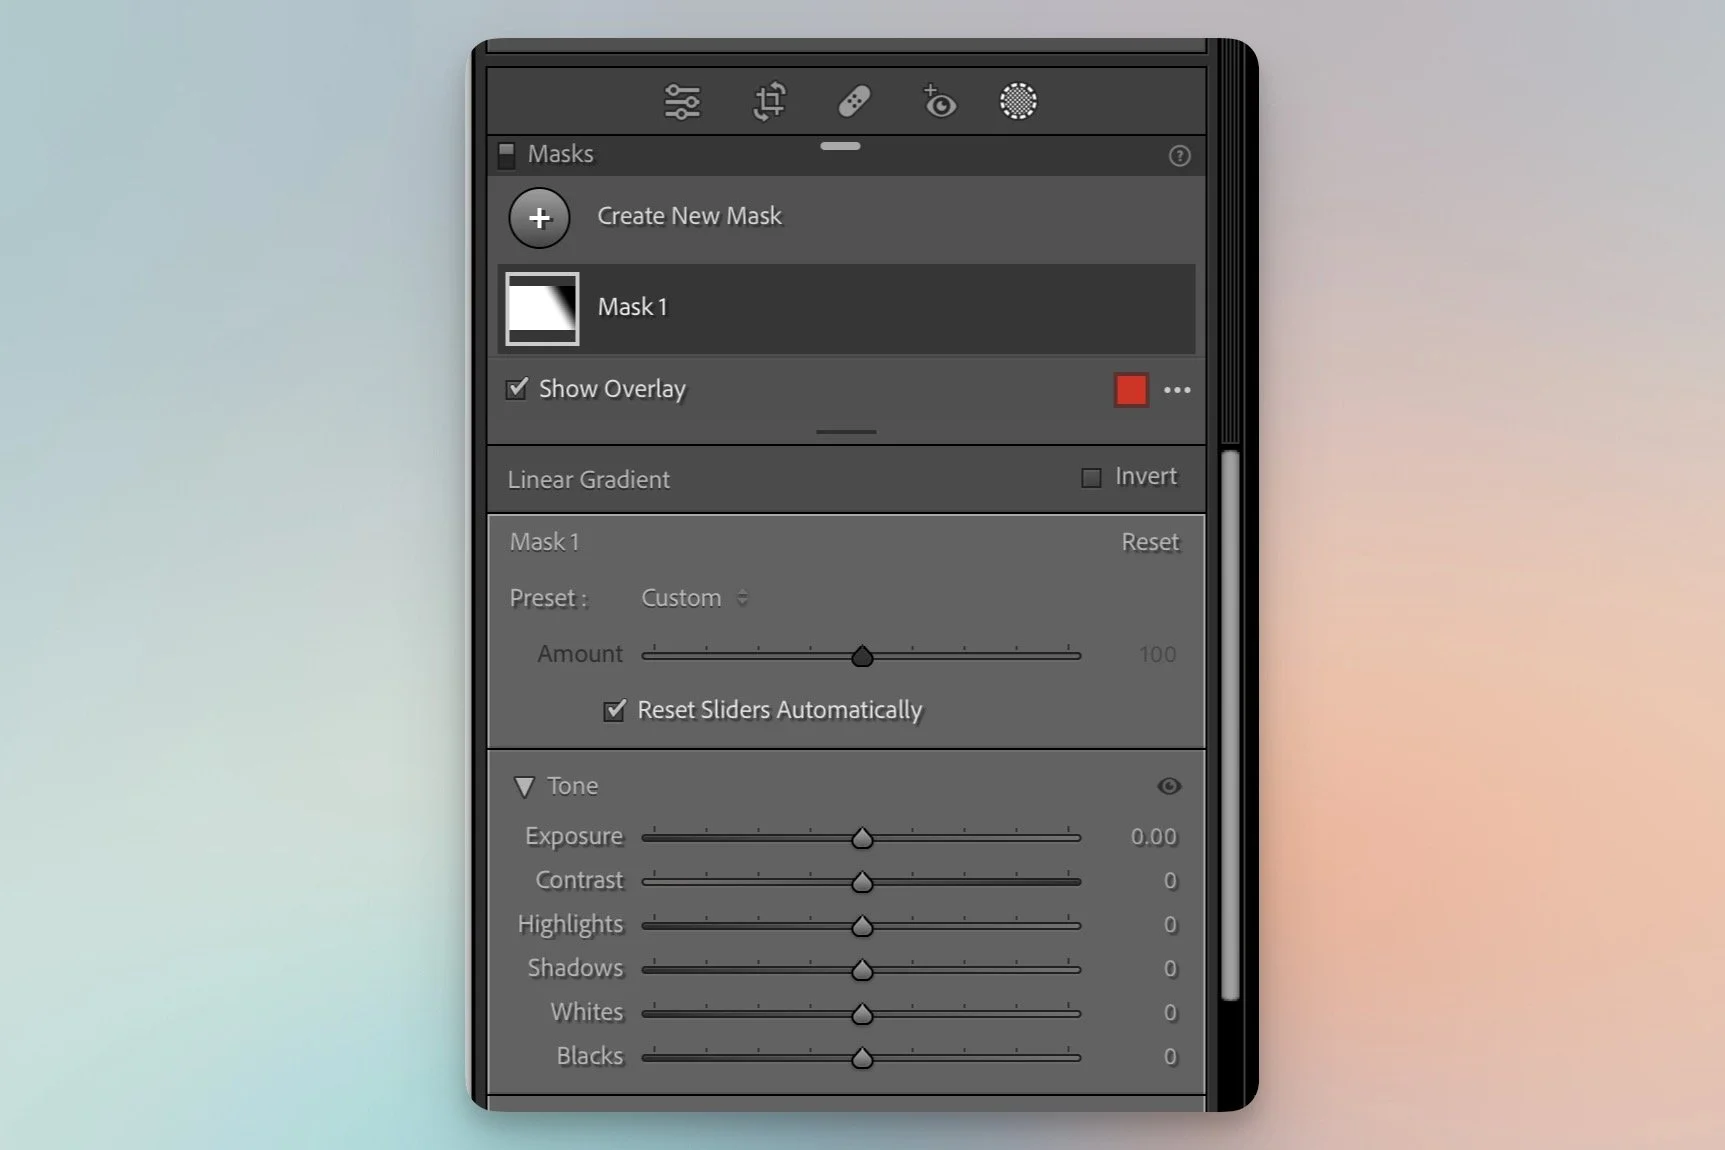
As you can see Mask 1 is selected and all the tools are available below, ready for editing. Good. But how do we add to or subtract from this mask? Maybe we right-click on Mask 1?
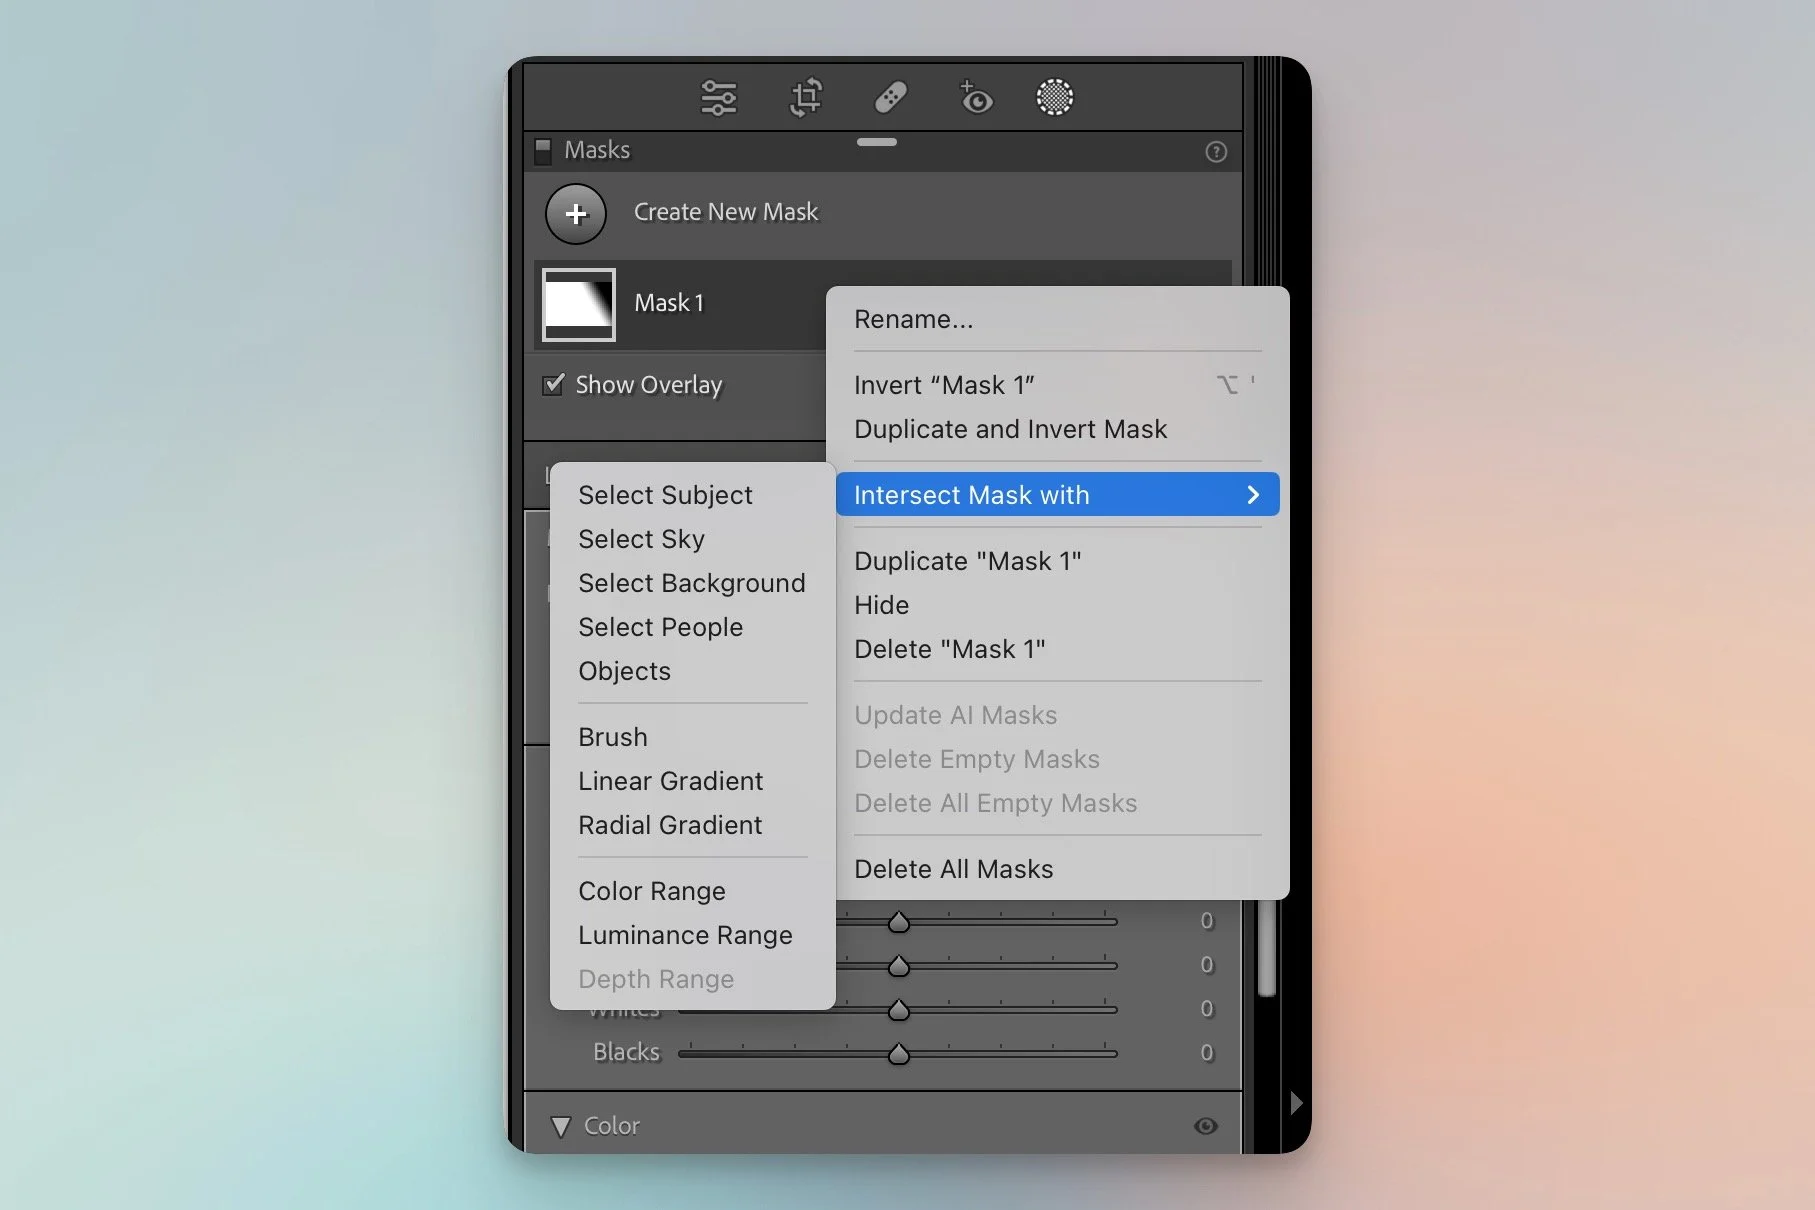
Nope. Lots of stuff here, all mask-related, but still no Add or Subtract. There is, however, an Intersect Mask with option that offers all the masking tools I'm looking for.
Hmm. When I encounter a contextual menu I expect it to provide all the options related to the object. Or, at the very least, a subset of the most important ones. So this menu is telling me that intersect must be how you edit a mask in Lightroom...which, it turns out, is not at all the case [2].
The solution? Clicking again on the already selected Mask 1:

Voilà!
Buttons! Like magic! Simple once you know, but also ridiculously easy to miss—especially since navigating from one mask to another in the panel still keeps those buttons hidden.
Not to be snarky but there's this thing called a disclosure triangle...I don't know, just a thought.
4. Of Masks & Layers
Ok, here we are: I mentioned "layers" earlier. I'm struggling to explain how masks work in Lightroom without using that term because in reality...that's what these are. What Adobe automatically labels as Mask 1, Mask 2 etc in the masking panel, are in fact containers—not the actual masks. To demonstrate further let's click the ADD button on Mask 1, create a radial gradient, and look at the results (note: this is another image so disregard the differences with the previous thumbnails) :
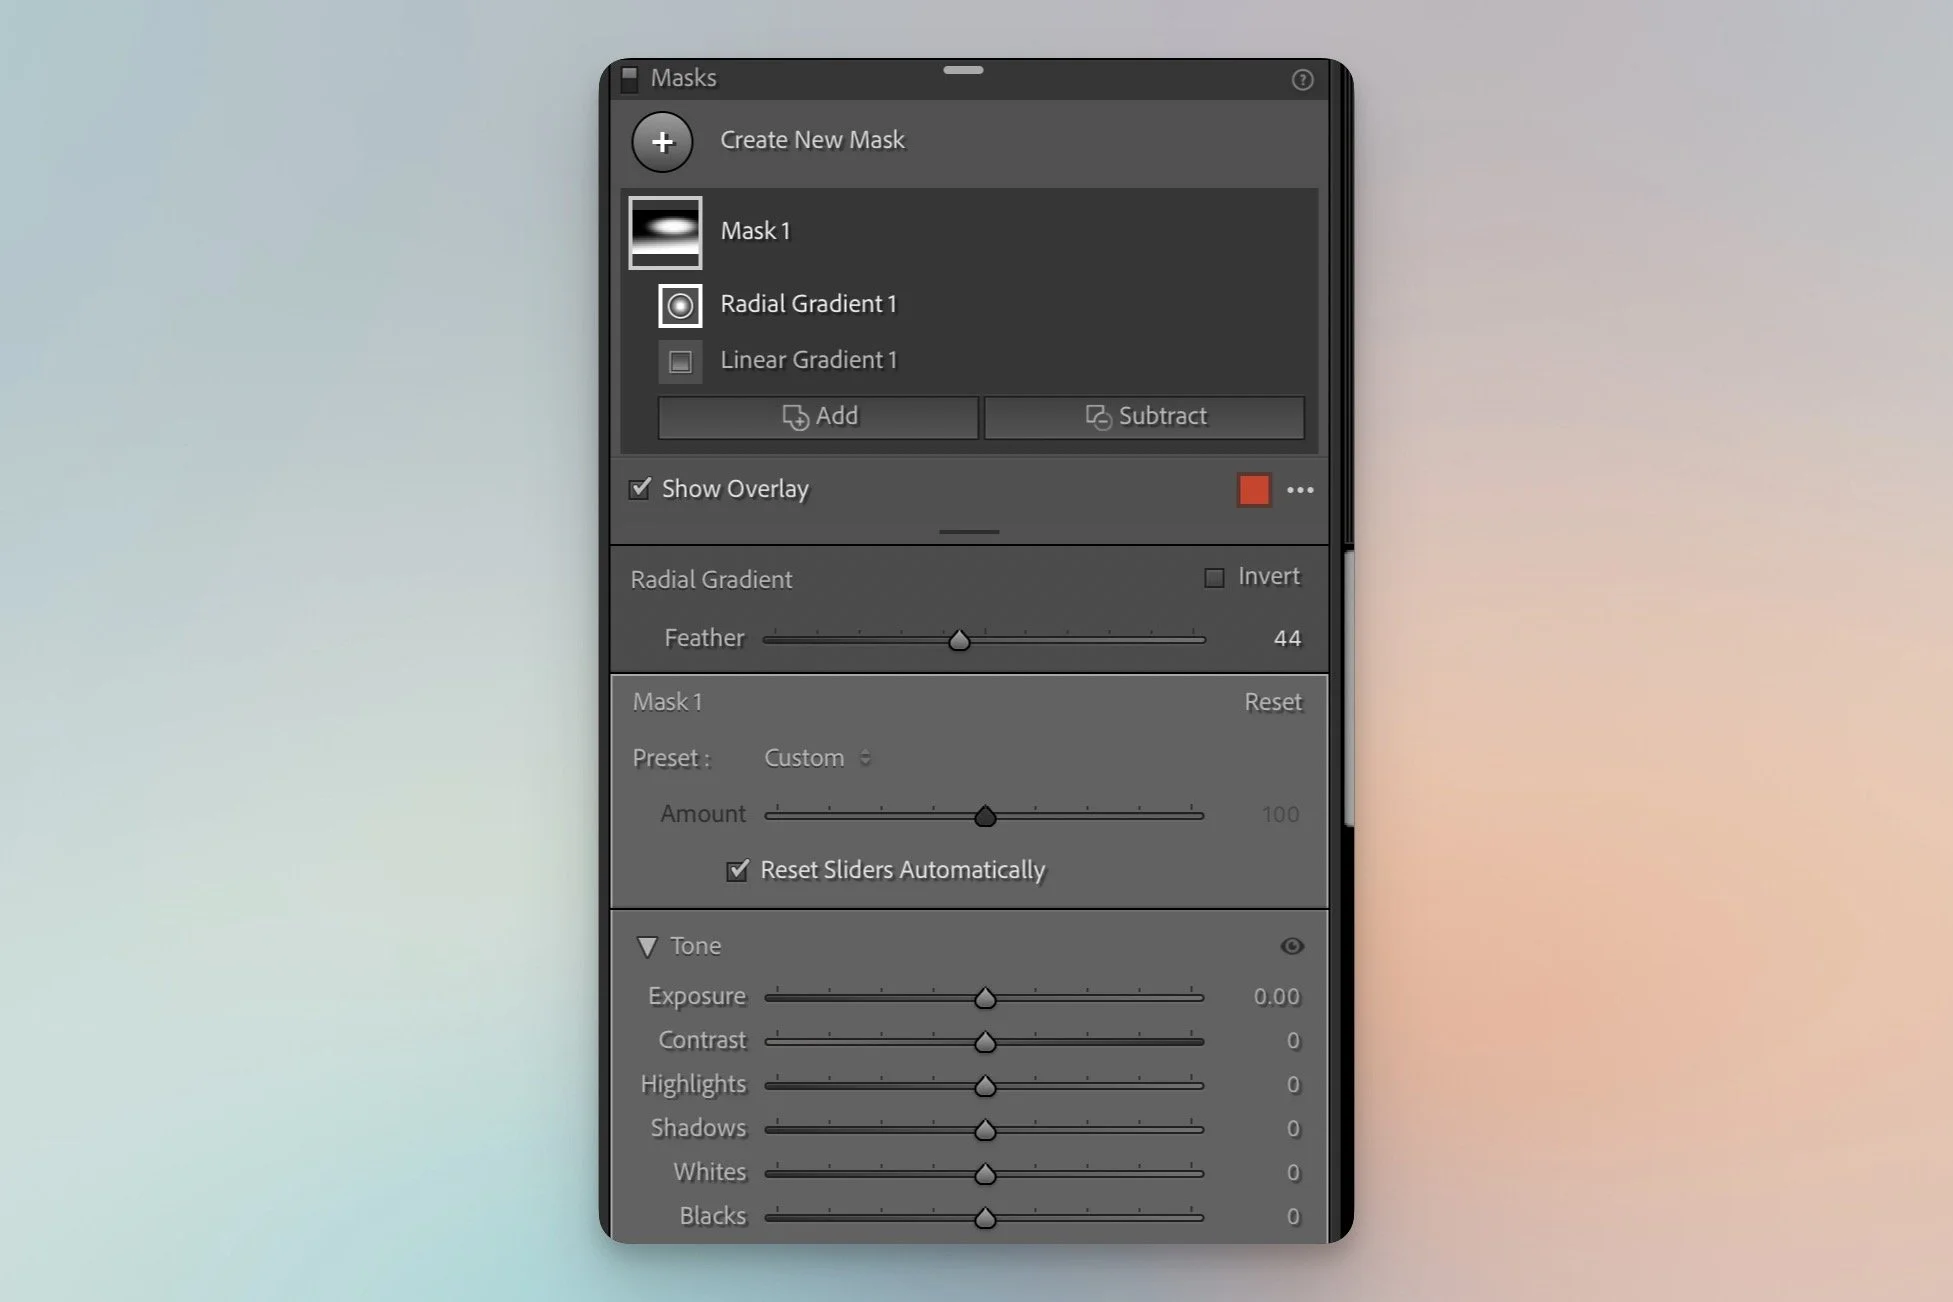
See? We now have TWO masks, appearing UNDER Mask 1. Why? Because Mask 1 is not a mask at all, it's a layer that holds individual masks:
A layer with an opacity slider (Amount).
A layer where all adjustments are made (Exposure, Contrast, etc).
This is a parent/child relationship, and every time we click the Add button a new mask is created underneath. The new mask can be anything we want—a brush, a gradient, even a luma or colour range. But Mask 1—the parent layer— will always control the adjustments and overall opacity of every mask it contains.
I personally think Adobe's naming convention is both wrong and needlessly confusing: it should be Mask LAYER 1, Mask LAYER 2 etc. Mask 1 is singular, it doesn't even hint at the possibility of holding multiple elements; worse, it hides this UI element's core function (and quickly becomes a spelling mistake). Yes, ultimately we can argue that it all results in a single grand unifying MASK that USES gradients and brushes and ranges...but it could be clearer.
Anyway, personal issues aside: it works. Once you understand the mechanics, and get over the subjectively flawed nomenclature, this "compartmentalized" approach to masking is extremely powerful.
For example: in Capture One, after creating a radial or linear gradient, you can use a brush or eraser to edit it immediately. But doing so rasterizes the mask: the app destructively converts the gradient to one big brush stroke, removing all controls in the process (those handles that make it possible to change angle, feathering, width etc). There's no going back after this point.
In Lightroom, however, those edits are treated as individual masks under a Mask Layer, which means:
Gradients remain intact and editable (they're never rasterized).
Any addition or subtraction can be toggled ON or OFF, or edited, without affecting other individual masks.
All individual masks can be repositioned independently.
Different methods of masking can be combined and controlled independently.
…
I fully admit it: this wasn't love at first sight. But the truth is I now find it much easier (and faster) to build and edit complex masks in Lightroom than I ever did in Capture One.
Next up: a look at AI and the more advanced features.
………………….
Actually, C1 CAN automatically generate layers when a masking tool is selected: but only the first one (i.e if no other layers exist). And only if the tool is a radial or linear gradient. I always found the behaviour baffling.
Intersect is an interesting feature we'll examine in the next post.