The Lightroom Profiles
When I moved back to Lightroom last December—after years of working exclusively with Capture One—I was particularly grateful for the time spent converting existing 1EYE SOCIETY styles over the summer.
Looking back, I can also admit it planted a seed in my mind: this can work my son, sunlight could shine here as well.
For everything a reason and a reason for everything.
I want to sit down and write a more extensive post about the switch, the features I've discovered and how I've adapted, but that'll come later. In summary? No regrets. Not even a twinge or a stir. I'm actually happier overall.
But until recently there were still two pieces missing in my Lightroom ecosystem:
Access to my preferred workflow on mobile (i.e using my own "looks").
Profile versions of the 1EYE Capture One styles.
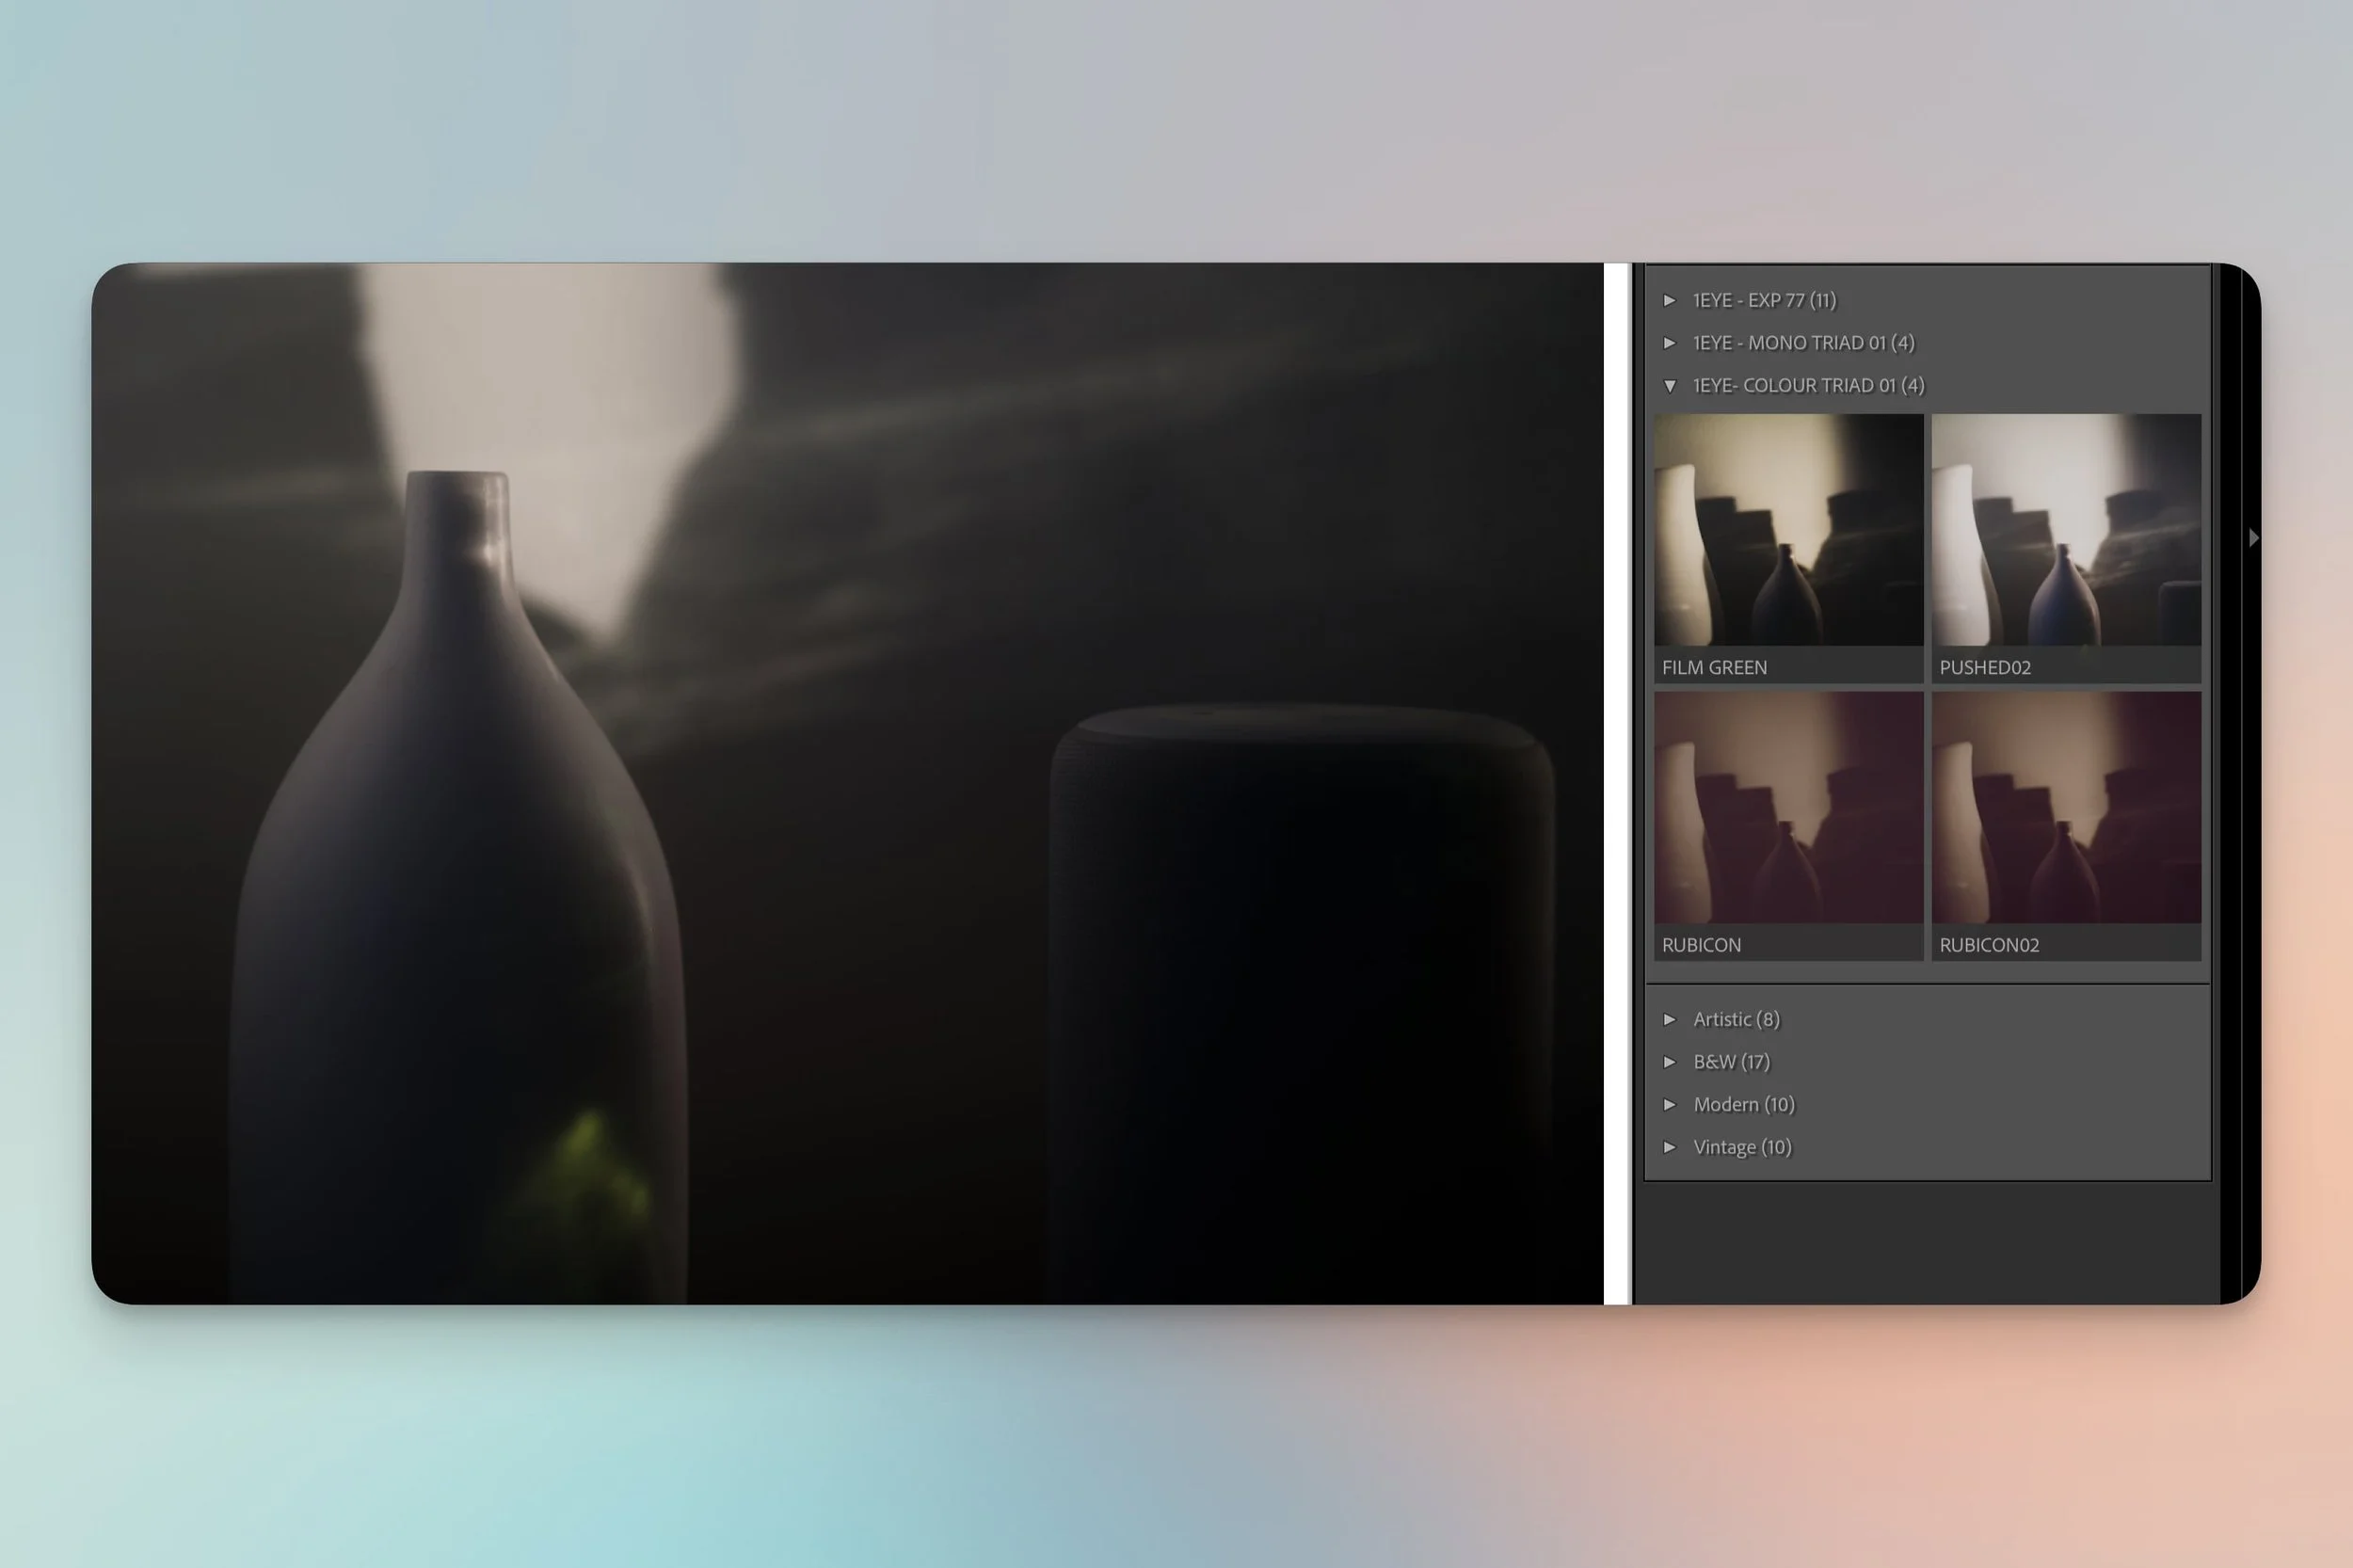
I've now fixed both issues. And starting today, subscribers can download new 1EYE SOCIETY profiles of COLOUR TRIAD 01, MONO TRIAD 01, and EXP 77.
Now for some details.
Why Profiles?
Good question, and one that threw me off at first. Because there are two types of profiles: raw and creative. Raw profiles are where we'll find Adobe Color, or any settings specific to cameras, like Fujifilm's film simulations. These are raw decoders, built into Lightroom. Creative profiles, however, act like presets: they can be applied to any image format to alter the entire look with just one click.
But there's a huge difference between profiles and presets: when we use a preset, all the included adjustments are applied to Lightroom's tools. Which means we not only see what a preset has changed, we can also modify those adjustments. If a preset includes a curve, it's in the Tone Curve panel. Every setting is a 1:1 relationship.
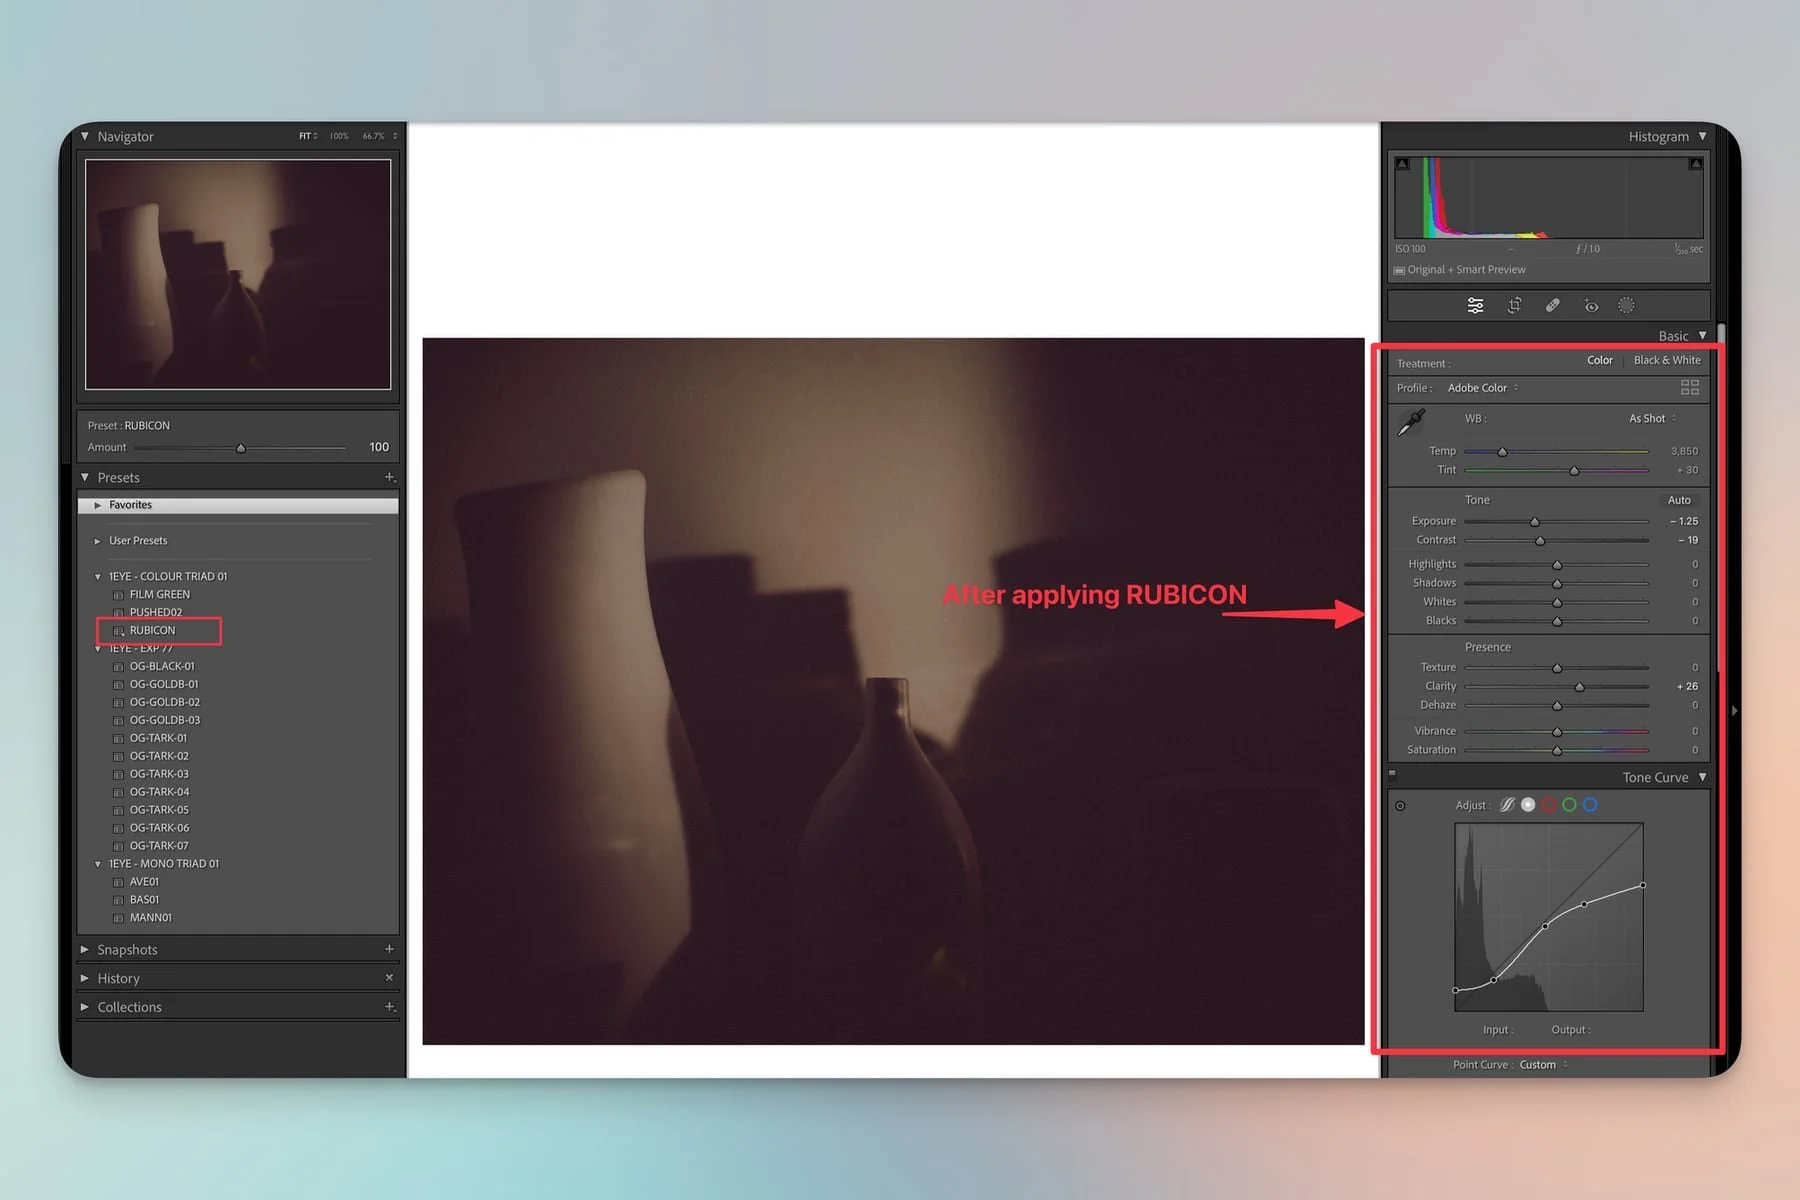
Lightroom tools after applying the RUBICON preset.
Profiles are another species entirely: like presets they can apply several adjustments at once, except that none of them will be accessible. That's because they're applied to the image—not the tools. It's like an invisible layer. The only control we get is an amount slider which allows us to set the intensity of a profile's overall effect. More, or less, of the intended "style".
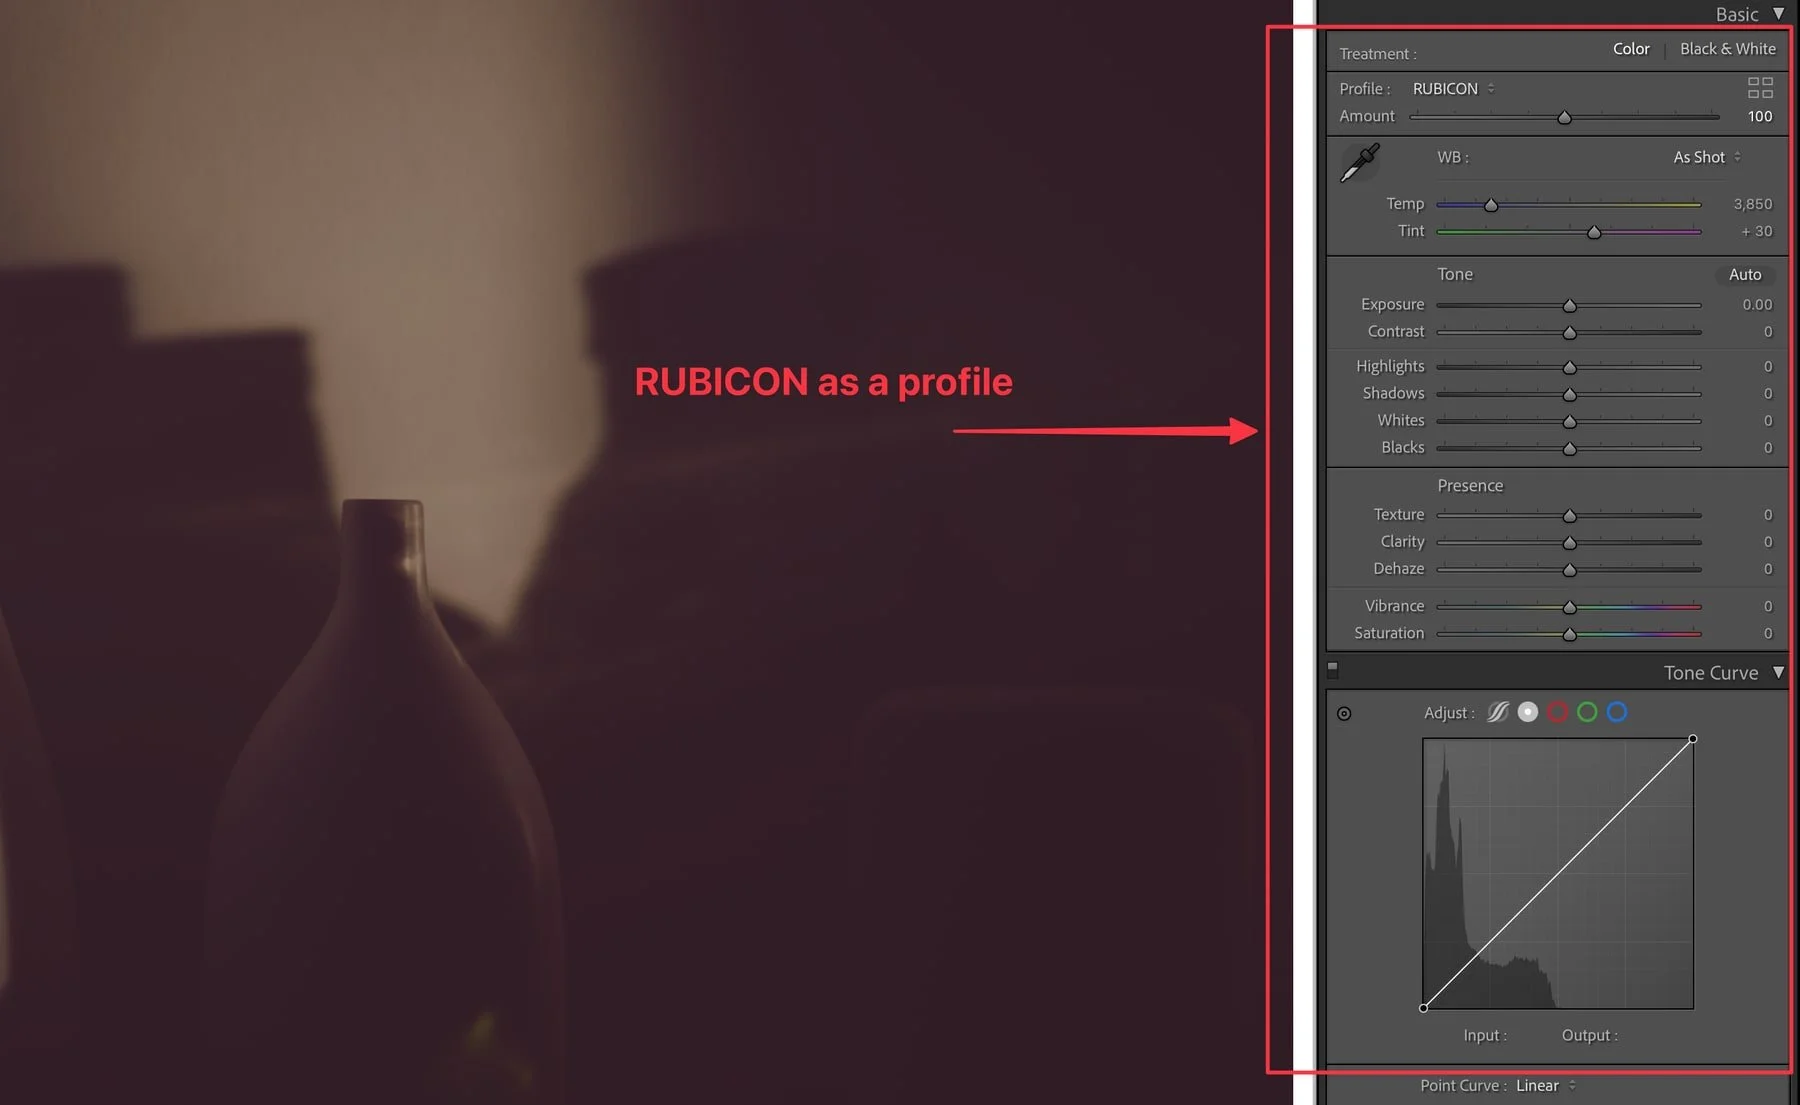
Lightroom tools after applying RUBICON as a profile: same look, but no visible adjustments.
Think of it this way: creative profiles act like Fujifilm JPEGs and film simulations—the entire look is baked-in. If we shoot in JPEG with Classic Chrome, we'll be processing Classic Chrome in post. That's our starting point. Similarly, when we apply a creative profile we're creating a new starting point, using the look it provides. The difference, of course, is that we can change our minds at any time—regardless of file type.
So why use profiles if they limit what we're able to control? Because after applying one, we still have all of Lightroom's tools at our disposal. Which opens up interesting possibilities. In fact, when I talk about using creative profiles as starting points, I'm over-simplifiying: we can just as easily apply (or switch) a profile as a finishing touch. It's like another coat of paint we can add to an image. Like seasoning. We can build on it, or add it at the very end.
Things to keep in mind:
A profile supersedes all other settings: if it includes a super compressed curve, there's no way to "uncompress" it with the Tone Curve panel. The profile's black and white points define the accessible range. It's a brick wall at both ends.
Any included effects will disable their corresponding tools: if a profile includes vignetting, for instance, the vignette tool is disabled—its sliders just won't work anymore. [1]
In light of this, I've made some changes to the 1EYE profile versions I've released:
All vignetting and grain have been removed.
I've added RUBICON02 and MANN02: both offer a less compressed curve than the original versions.
Quick look at all the profiles below, on a raw file with no adjustments whatsoever (keep this in mind on the more intense looks—they can be dramatically altered with just a few basic tweaks).
ABOUT The MOBILE EQUATION
I've been greatly enjoying Lightroom's seamless mobile workflow. For me, Classic's individual control over synced collections or images is the perfect balance between access and management. I've set Lightroom (mobile) to import only what I shoot with its iPhone app, so I get to control what ends up in my library when I get home. Nice and simple. Fun too.
But Adobe do go out of their way to make Classic the ugly duckling of the family. Case in point: presets and profiles. I had to download the Lightroom app (non-classic) and import all the corresponding xml files (User>Library>Application Support>Adobe>CameraRaw>Settings) to get everything transferred to the mobile apps. From there it took seconds, but it's not the most elegant process in the world.
It makes sense, mind you: Lightroom (desktop) IS Lightroom (mobile). I get the idea. But meh.
Then again the only place you can create those Lightroom profiles (afaik) is in Camera Raw. Not Lightroom (any version). So elegance... it's hard to come by at times in Adobe Land. Nothing’s perfect.
That's it for now. If you're a 1EYE SOCIETY member the new profiles are available from the BENEFITS page. Have fun :)
………………
Affected settings should be greyed out IMHO, with a short message explaining why (ex: "disabled by current profile").